 |
|
In early autumn 2011, I read about how someone had transformed their N64 into a portable game system. I remarked to my brother that it almost made me want to learn electronics and create my own portable game system. He said, "Well, what's stopping you from doing that?"
That got me thinking, and then obsessing. I started looking into how the guy did it, and found that there were quite a few people out there that had "portablized" their game systems, from the NES to the PS3. So, I decided to do it. I have nearly every game system that Nintendo has ever produced (I didn't buy a Virtual Boy, and haven't had reason to get a Wii U or a 3DS as of yet). I decided to start with the original Nintendo Entertainment System since it would be the simplest one to do, and I could move on to more advanced systems later (I'm currently working on a portable GameCube).
However, this is not intended as a comprehensive guide to portablizing your game system. This is a description of my journey, the pitfalls, the mistakes, and the compromises. I hope it is of help to someone, or if nothing else, that it'll make people say, "DAMN, that is COOL!
My primary source of info was 1up's awesome DIY that can be found here: How-to-Make-a-Portable-Game-System. You should read it all the way through at least three or four times. I also read Ben Heck's book, which can be acquired for outrageous amounts on Amazon. Then, of course, there were the forums. BenHeck, ModdedByBacteria (later "made-by-bacteria," now Bacteria's Site), console modding site, as well as a handful of others.
In the spirit of community and openness, while most of the material on my site is copyrighted, this guide is not (including all images herein). I stand on the shoulders of giants, and there's too much of that work in my creation for me to claim all the glory. All the images herein were taken by me, of my system, and nothing here is lifted or "borrowed" directly from another site. However, please feel free to use, copy, distribute, modify, add to, or improve this guide. I want you to. Really! (I would appreciate it if you'd credit me, but you are not required to do so.)
- You may choose to do anything in this guide at your own risk. I am not responsible for you fucking up your system. Even someone experienced with soldering and electronics can turn a fully-functional game system into an silicon brick. Someone with no experience is almost guaranteed to break something. (for examples, just read the rest of this guide)
- No, you may not buy my NES boy. Part of the point of all this was to retain a system I could still use, and it's too much of a labor of love for me to part with it.
- No, I am not taking commissions at this time. As I get more experienced I might make systems for sale, but not now.
The tools/supplies listed below are what I used in the creation of my NES boy. Feel free to use different brands/products. Half the fun is experimentation, so figure out what works best for you, and run with it.
 |
| Click to Embiggen. |
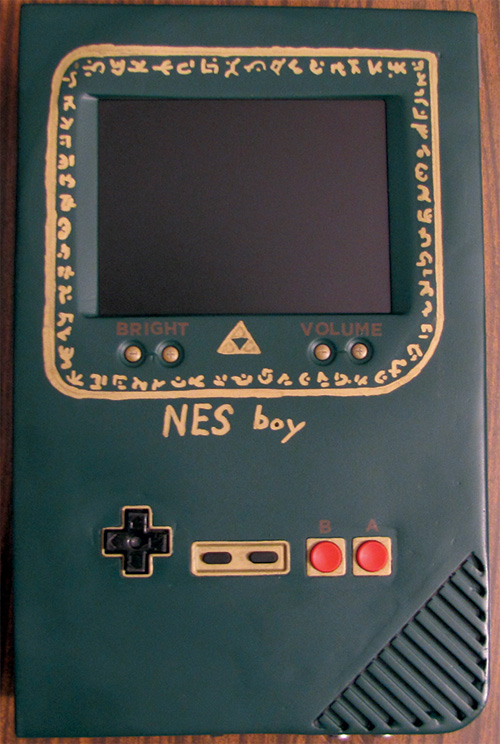
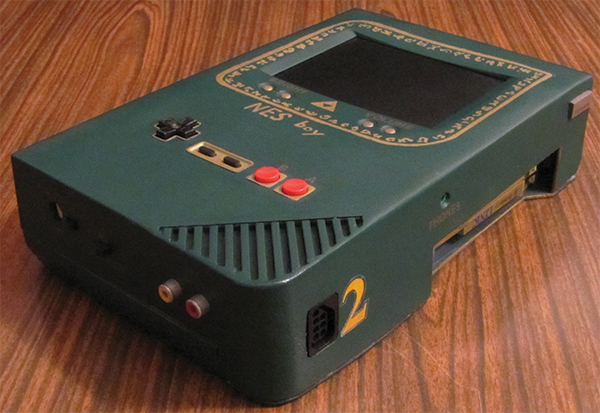
This is the blueprint that I used for my system. I've cleaned it up and inked it for your convenience, but this was how I was able to achieve all the goals I set forth at the beginning of the project. I wanted my NES boy to have:
To accomplish this, we needed a switch to select the power source (separate from the main power switch), a switch to select either the built-in display and speaker or A/V out, and the headphone jack that was built-in to the PSOne screen we're using. Handy!
Disassembling the system is pretty straightforward. The original NES was the first and last Nintendo system to use regular Phillips-head screws rather than the gamebit and tri-wing screws of the later systems. You'll remove a couple of RF shields (which we'll be using later on - waste not, want not!). Just keep unscrewing and removing parts until you're left with the motherboard.
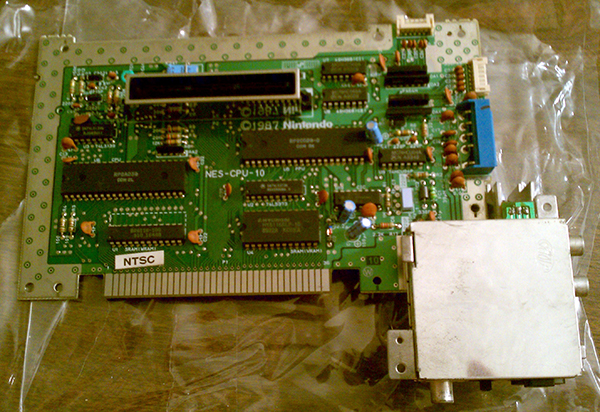 |
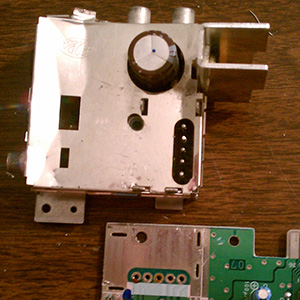
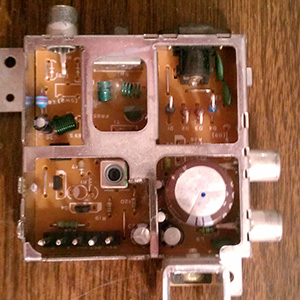
Once we have the NES taken apart, we have a motherboard with a big honking RF Modulator/voltage regulator sticking out of the corner. That will need to be removed, and will not come quietly. Desolder it and pop it off, but try not to break anything in the process. We have plans for several components from that.
 |
 |
 |
 |
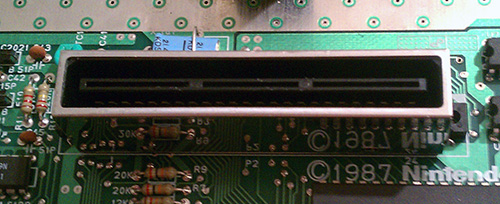
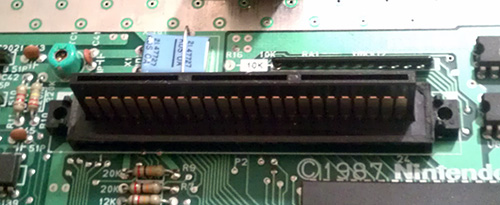
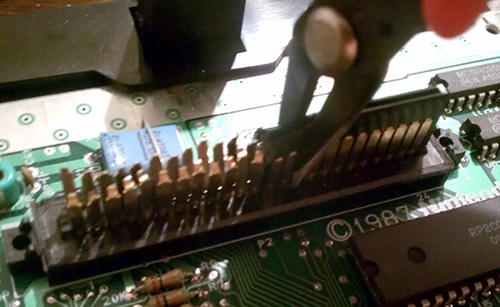
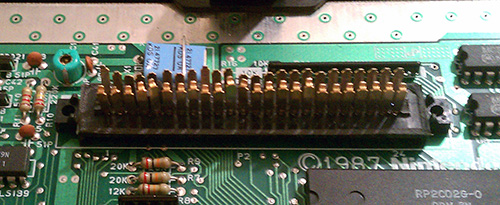
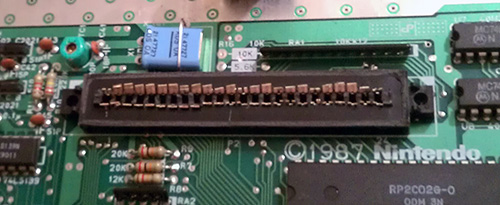
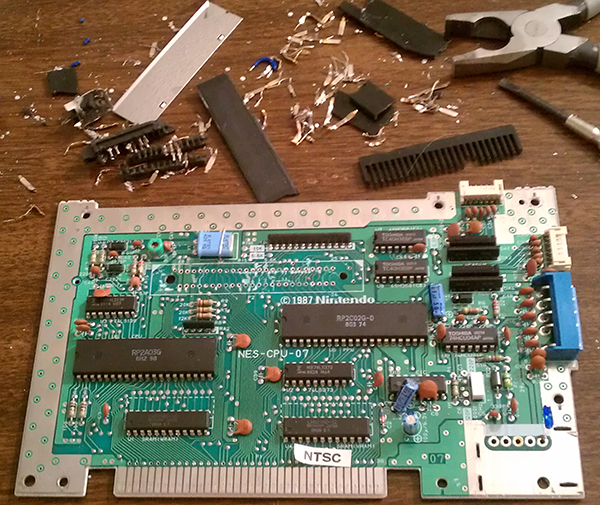
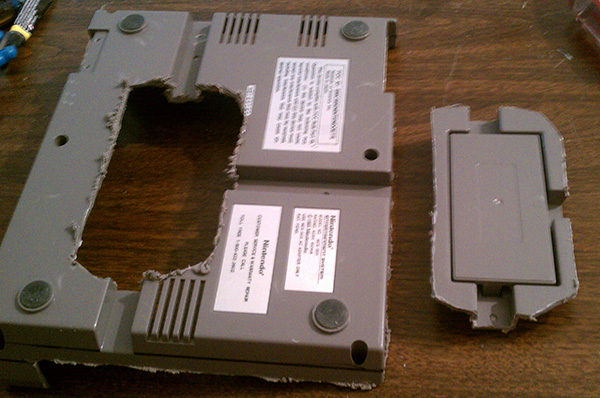
The other major component that needs to be removed is the expansion port. Nintendo likes to include these in every system, even though they almost never get used. Here, it's right in the way of my screen, and a barrier to a reasonable thin system. Any weight we can shed needs to be cut. The access panel for the expansion port also makes a perfect battery door, as you'll see when we build the final case.
 |
 |
 |
 |
 |
 |
Removing the RF Modulator also killed the power supply, so now we'll need to create another one. The set up on the NES is somewhat odd. The adapter you plug into the wall takes 110 volt current and turns it into 9 volts. Then the voltage regulator in that box turns it into 5 volts for the motherboard. You'd think it would be easier to just have the wall adapter output 5 volts, but Nintendo likes to do things their own way.
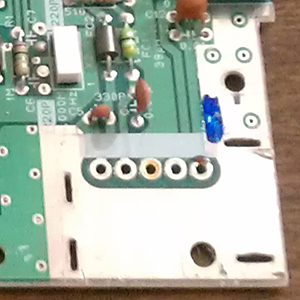 |
| Left to right, we have video out, audio out, +5 volts in, and the connections for the power and reset buttons (which we won't be using). |
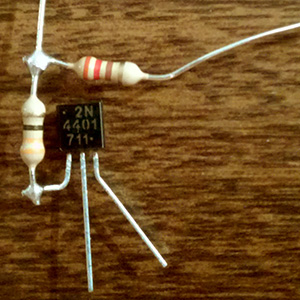
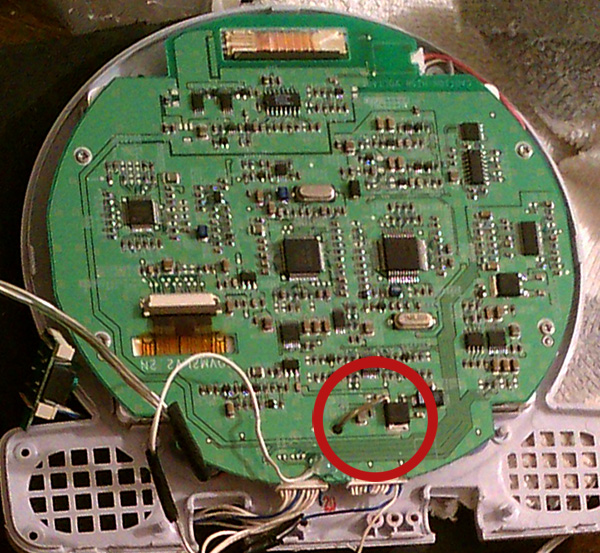
The other thing we killed was the video amp, which will need to be recreated. This requires a whopping three parts, and was one of the simpler things to construct for this project.
 |
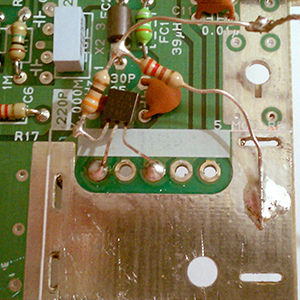 |
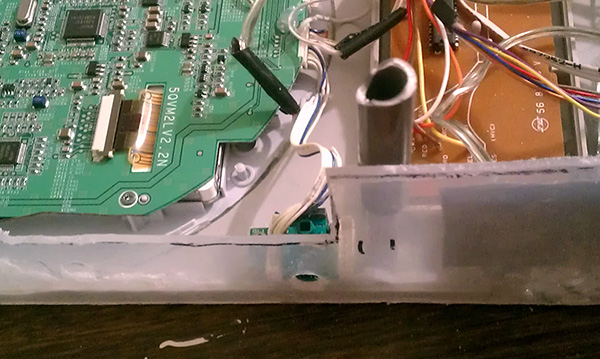
Here we have a 2N-4401 amplifying transistor, and two resistors (33Ω and 220Ω). On the transistor, the three prongs, left to right, are Video Out, Video In, and +5 volts in. Solder the 33Ω to Video Out, and wrap the 220Ω around the other end of the 33Ω, leaving the wire sticking out of the bridge between the two (this wire becomes our Video Out). Solder the rest to the motherboard as shown (the silver border to the motherboard is the ground connection, so we'll be soldering a lot to the exposed metal in this corner).
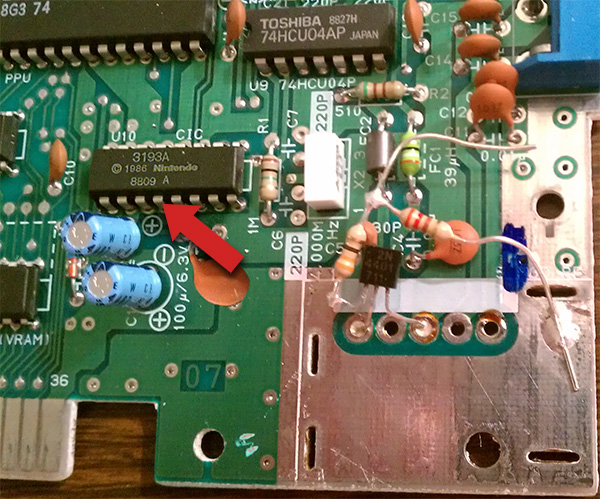 |
There's one other thing we might as well do while we're here: disable the lockout chip. There's a chip marked as "3193A" which the NES uses to tell if you're using an authentic NES cartridge. It has a tendency to malfunction, though, and give you a blinking screen. To disable it, cut pin 4. Gently snip it off with some fine-toothed wire cutters, and you'll be much less likely to get a blinking screen.
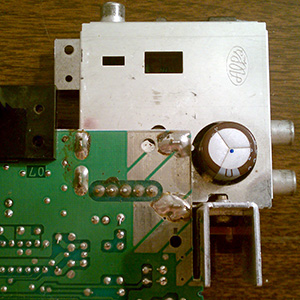
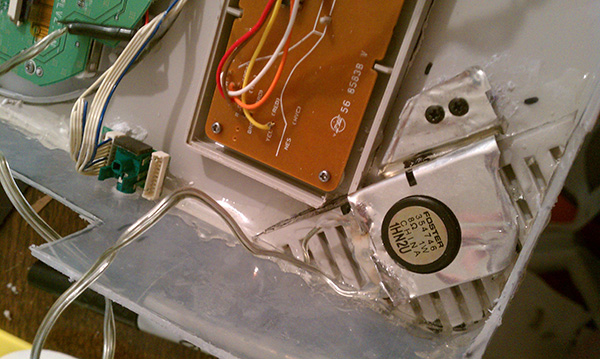
For power, I wanted my system to be able to run on batteries or an AC adapter. The screen I'm using is the modder's favorite of the Sony PSOne screen. This came with an adapter that outputs 7.2 volts, and 6 AAs also provides 7.2 volts, so we can run the screen off of either. For the NES motherboard, we'll need to drop that 7.5 volts down to 5 volts. We'll be using the LM7805 out of that RF box we removed earlier. Desolder it and the heatsink. Keep the heatsink attached, as stepping down voltage does generate a fair amount of heat.
 |
This is where we encounter the differences between different guides, because I found at least a half dozen similar but different diagrams for the voltage regulator. The basic setup is that the power from your battery (+7.2V in our case) connects to the left prong on the LM7805, the right prong will connect to the +5 volts on the motherboard, and the center prong is the ground. It's best to have some capacitors on either side to "smooth out" the voltage, but they are optional, and pinning down exactly what microfarad (µF) they should be is anybody's guess. I used 1000µF on the +7.2V in, and a series of 0.1µF, 1µF, and 0.1µF on the +5V out.
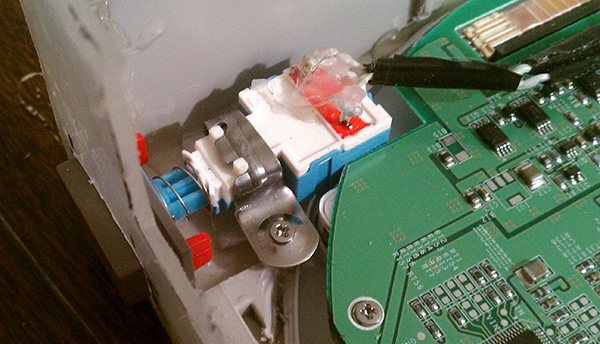
Next up, we have a mod that you have to make to the PSOne Screen. You might have noticed a red wire in the wiring guide that leads to a +5V on the screen. The PSOne Screen is designed to connect to the PSOne system, and is expecting to get +5V from that system to tell it to turn on. We're going to trick it by using the voltage regulator built into the screen!
 |
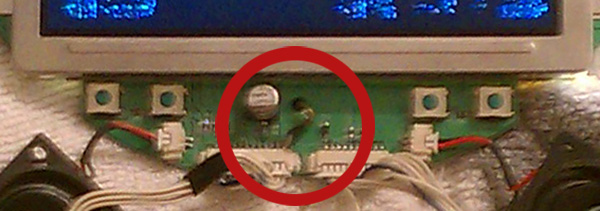 |
Connect a wire to the left prong (since it's upside down), then feed it through the hole for one of the mounting posts that we won't be using, and finally connect it to the +5V on the front. Now the screen should turn on. Yay!
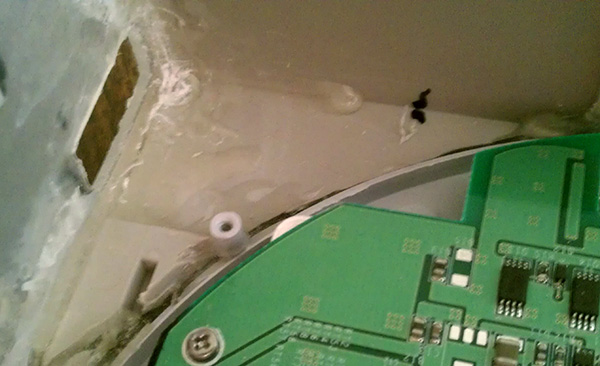
On to the case construction! Easily the most time-consuming part of the process. Part of that was my desire to make a cool system that looked like a giant Game Boy, but most of that was trial and error. Lots of error, really. The most disappointing of which was the loss of the spring-loading mechanism. I noticed that the "toaster" loading box provided a lovely framework to build a system around, and wanted to retain that pop-up cartridge slot. I even cut close to a half inch off the screen's motherboard to accommodate it, and thought that I'd measured everything precisely. However, I found in the end that I was off by about 3/8 of an inch, which lead to this:
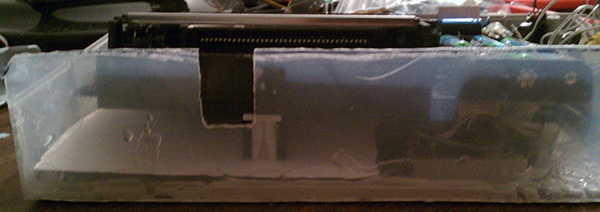 |
So, sadly, that loading mechanism had to go, and my system became a regular slot-loader. In the end the system still looks pretty damned cool, but I miss that familiar creak of the springs when putting a cartridge in. (._.)
But I'm jumping ahead a few steps here. First off, make your system work. There's no point to an awesome case if the system doesn't turn on, is there?
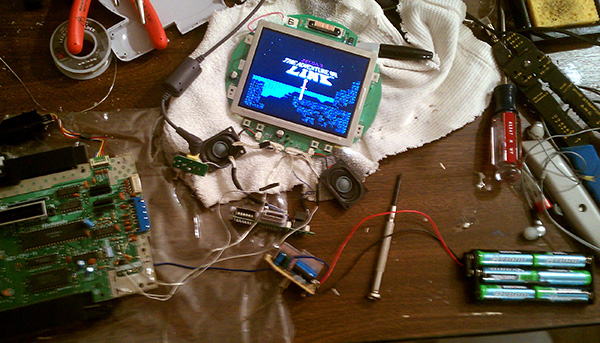 |
| I'm pretty sure all of my neighbors heard my shout of "YES!" when I first got this to boot up. |
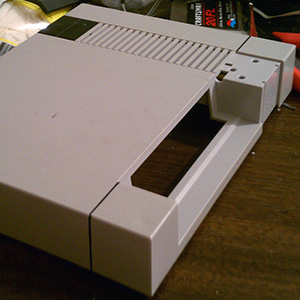
Second, decide what you want to use for a case. I chose to "frankencase" it because I couldn't find a box that would accommodate the system without a lot of modification anyway, and because in the process of killing a game system, you're taking everything out of a case that screws together and fits the motherboard perfectly. The problems arise from fitting the screen, the controller, the battery, and everything else inside. Fortunately, the NES case is largely empty, so there was more than enough room for everything, and I ended up cutting more than an inch off the front, and almost as much off the bottom. The remainder I created from a Sterilite container that I wasn't using, a metric tonne of plastic epoxy, superglue, and Bondo. (...and more than a little elbow grease.)
First we measure everything, and try to figure out exactly how small we can make this thing.
 |
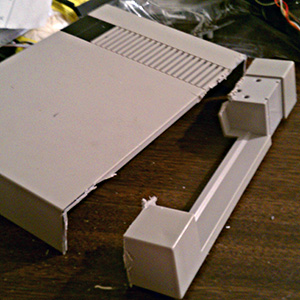
Then we lop off the front of the top of the case. The Dremel is great for sawing through plastic, but it's probably going to melt it in the process. This molten plastic will cool quickly, and breaks off nice and clean, though. A bit of sanding or filing, and you can start gluing things together.
 |
 |
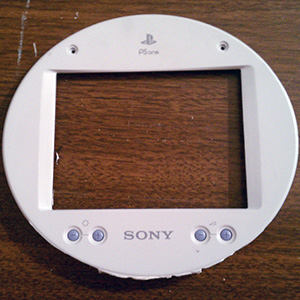
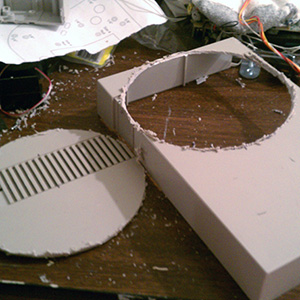
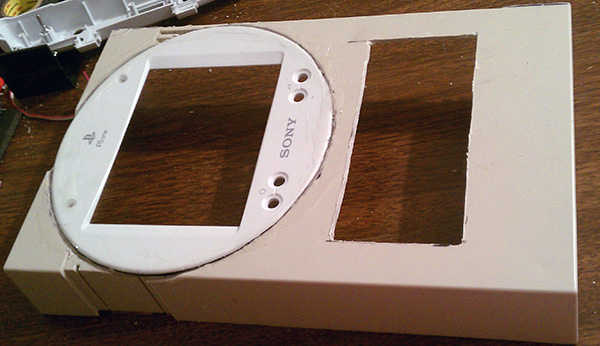
Now we need a hole for the screen. We're using the front panel from the PSOne screen since it has the mounting holes built in. We'll just cut off the speaker housing from the bottom since we're going to be moving the speaker down to make it look more like a Game Boy.
 |
 |
 |
 |
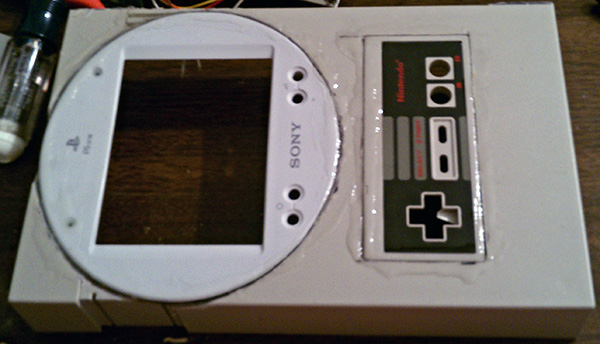
...and a hole for the controller.
 |
Epoxy that bad boy in there, making it as flush as you can.
 |
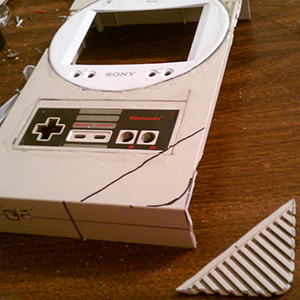
Finally, we need the grill for the speaker. We'll use a section of that grill we lopped off for the screen's hole. Top it off with a corner of a Sterilite container, and voila, our top half is mostly done.
 |
 |
 |
|
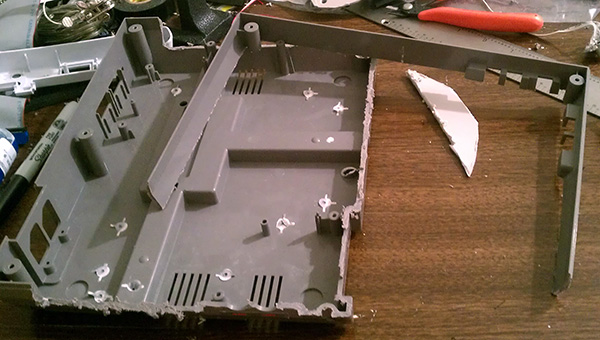
After that, we work on the back half, which will need the top half of the bottom of the NES case.
 |
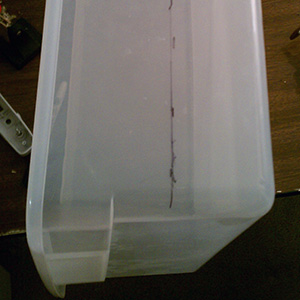
And a section from the bottom of that Sterilite container.
 |
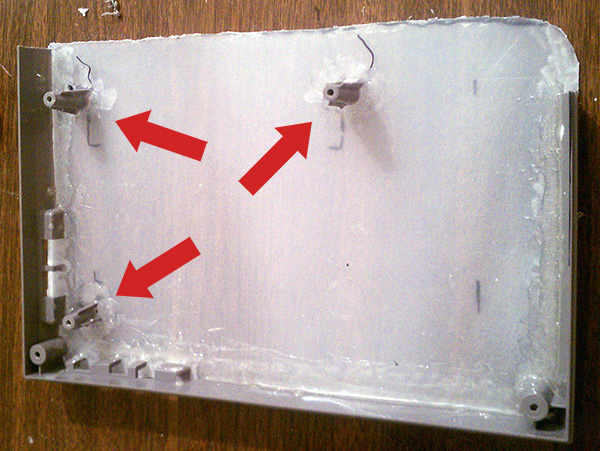
Now that the frame is in place, we have to secure all the inner components to the outside. The motherboard will be secured with these three posts from the unused base:
 |
The headphones jack was pretty easy, apart from the fact that the cables were really only long enough to allow it to be put in one location, but since that was the place I wanted it anyway, Huzzah! Just drill that out with the Dremel and file it smooth. I used one of the mounting posts from the PSOne Screen to secure it.
 |
Remember that top panel to the RF box? Turns out that the hole for that huge capacitor fits the magnet for the speaker perfectly. With some creative trimming and bending, as well as two of the screws and mounting posts from the base of the PSOne screen, our speaker now sits comfortably and securely behind the grill.
 |
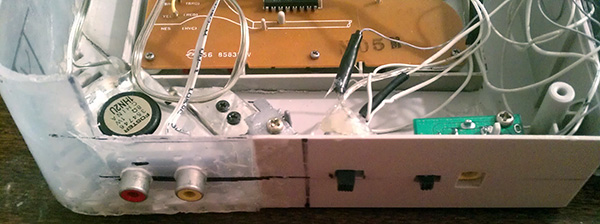
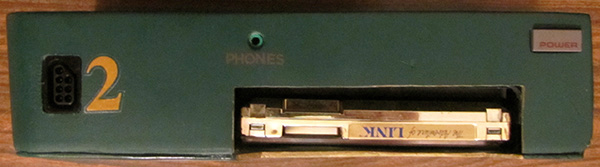
Next up are all the ports on the bottom of the NES boy. Left to right, we've got the AV jacks, the AV selector switch, the power selector switch, and the power jack for the AC adapter. Drill them out, and file them smooth. To mount them in place, we're using posts from wherever we can find them, and epoxying them in place. The bracket holding the AV selector switch is a picture hook bent into a nice holding shape.
 |
 |
 |
Now, on to the second controller port, where the issue becomes not how to hold it in place, but how to reinforce it so that it will stay in place when someone shoves a controller plug into it. Remember those RF shields I told you to keep? Well, through a fair amount of bending, cutting, and filing, you can end up with something like this:
 |
It's anchored behind the A/V jacks and the edge of the controller, so it doesn't even need any screws to hold it in place, and it is more than strong enough to keep the second controller port from being pushed in.
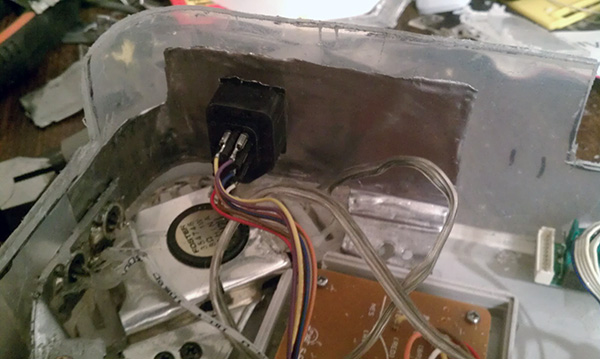
The power button was another component that was more of a headache than it needed to be because I insisted on using the power switch from the console, which is ENORMOUS. Seriously, this damned thing is almost three inches long. It also needs to push in and out freely without getting stuck on the edge of its hole. This meant the only place I could stick it was in the upper-left corner, and it BARELY fit. I had maybe a mm of leeway all around. After the failure at the loading mechanism, I was going to get this part to work even if I had to chop off the top of the screen's motherboard and LED mod the backlight. But I did it!
 |
 |
| Another picture hook carved and bent into a holding bracket. |
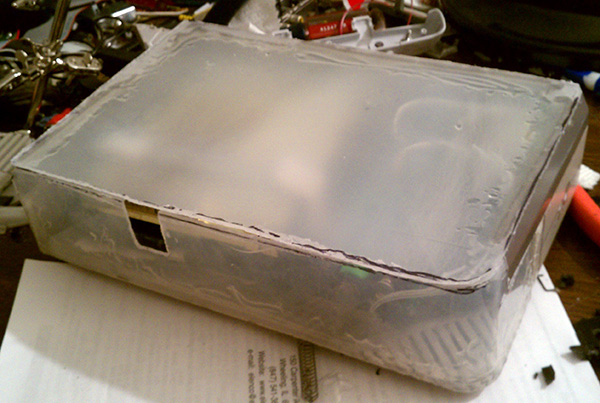
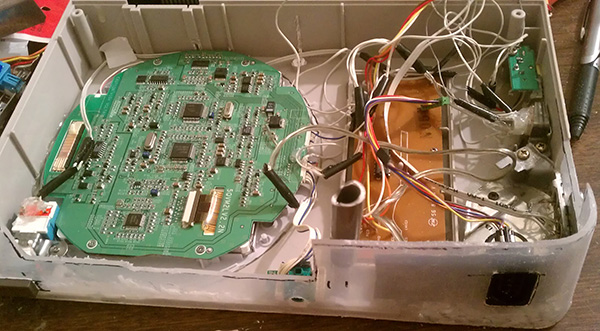
By the time you're done, the insides will likely look like quite the rat's nest.
 |
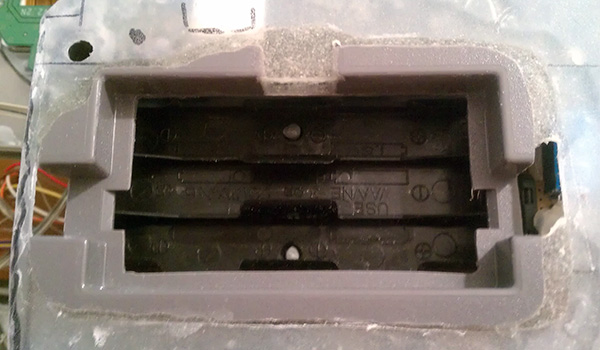
The battery door was another headache. Since I'd glued the battery case to the motherboard like a dipshit, that meant I couldn't move it, and where it was glued meant that the battery door would be right next to several important screw posts. At first I tried to have a panel with a single screw holding it in place at the top, while the bottom and right edges had a groove cut in them to sit flush with the back panel, which also had a groove cut into it. Add a block of foam to keep it from falling in, and we have ourselves a battery door. A very shitty battery door.
 |
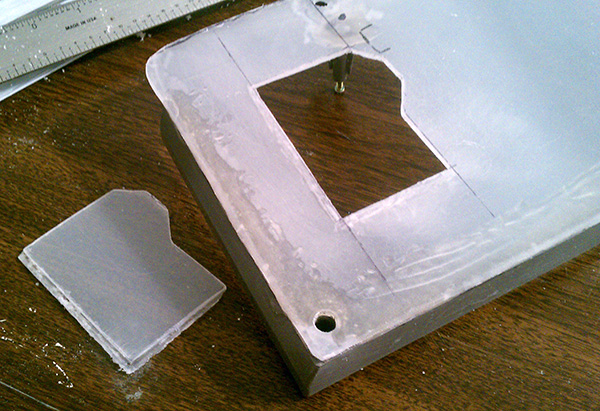 |
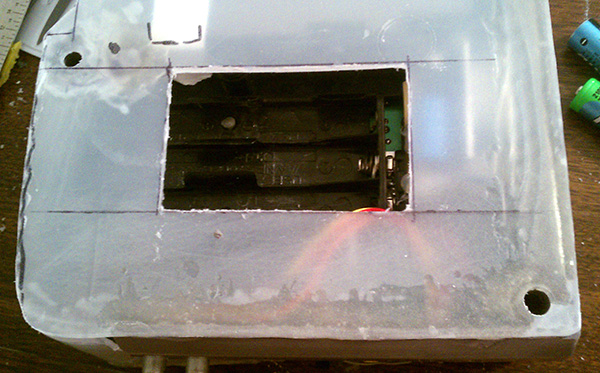
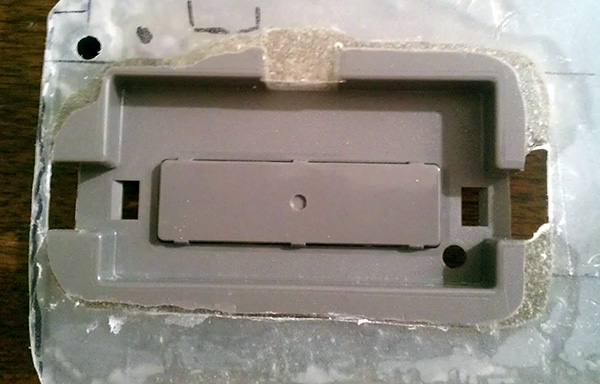
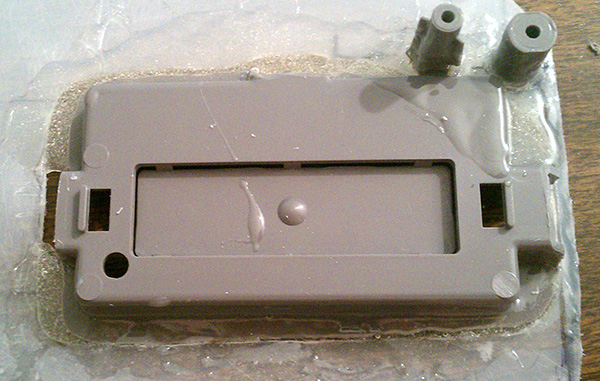
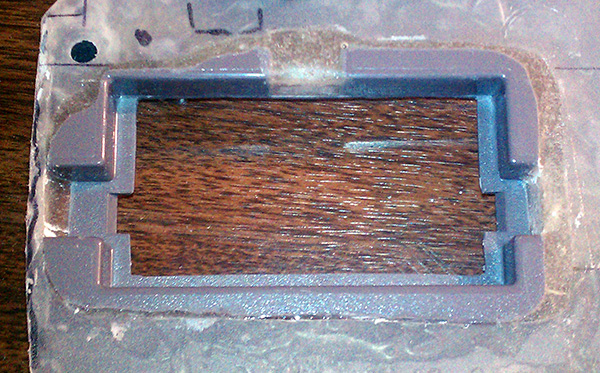
The better solution was the access panel for the unused expansion port on the bottom of the system. This required careful Dremeling and filing to work it into place. And a shitload of epoxy. This was when the Artist tape really shined. By taping off the edges and corners I was spackling epoxy into, I created a nice, smooth border for the mantle. And since Artist tape just peels right off without even leaving residue, we were halfway to greatness.
 |
 |
 |
 |
 |
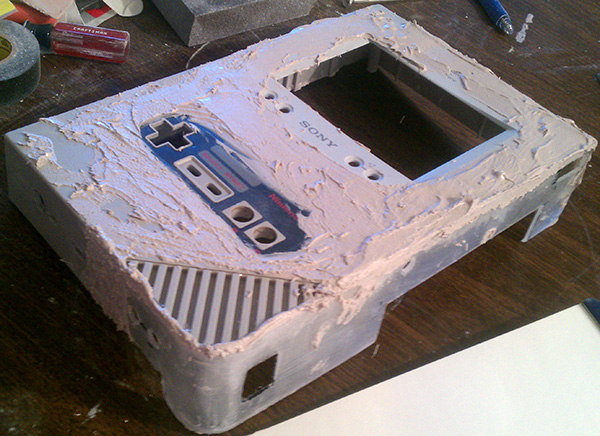
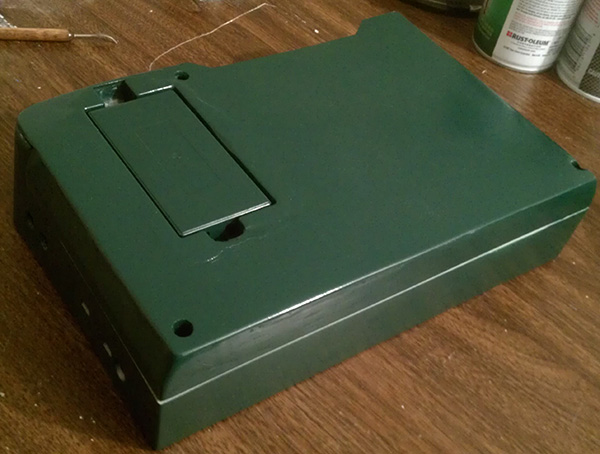
The final stage before painting was to bust out the Bondo. Bondo reeks something awful, especially while it's curing, but it creates a nice, sandable material that dries in minutes. This is something that calls for a garage, but if you don't have access to one, just open all the doors and windows and turn the fan on high. And maybe pop an Excedrin or two, just in case.
Bondo is another binary compound, like epoxy. You scoop out however much of the base you think you'll need, and add a bit of the hardener. The trick is to add enough hardener that it will cure, but not so much that it cures in 5 minutes. You want to be able to work with it a bit, and the fewer applications of this stuff, the better. A paper palette is perfect for this, and you mix and apply the Bondo with a plastic spreader. After it cures, we start the sanding. And if you aren't doing this in a garage, stop every few minutes and vacuum up the dust. Because this stuff reeks as well, and will get EVERYWHERE. Not a fun clean-up. Months later, and I was still finding it in places.
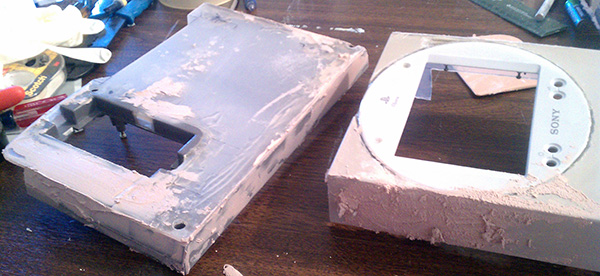
So, you spackle on the Bondo, concerning yourself more with getting it into all the nooks and crannies than making it smooth. You're going to have to sand the shit out of it anyway, so your first application will probably look something like this:
 |
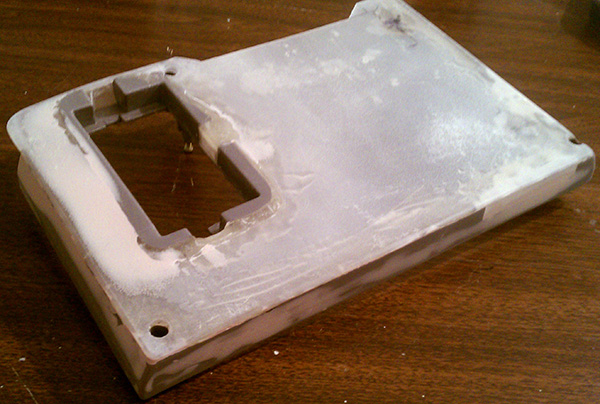
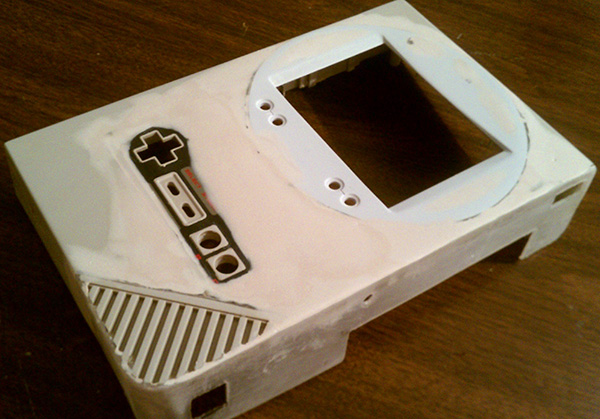
Looks terrible, right? But after sanding, it looks like this:
 |
 |
After a few more applications that start like this:
 |
We'll finally have something that looks like this:
 |
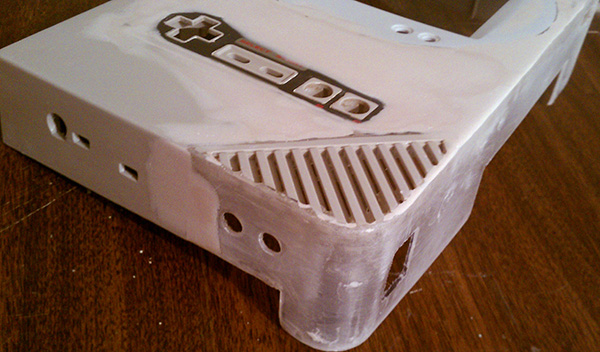 |
The catch here is that you want to use finer and finer sandpaper (or sanding blocks, like I used), ultimately getting it to a silky smooth finish, but what feels smoother than a baby's bottom to the finger might still have little bumps and ridges that will be revealed to the eye when we start painting. And unless you want to sand the paint to get it silky smooth before adding a second coat, you want your case shiny enough to see your face in before you break out the spray paint.
Speaking of spray paint, GET A MASK, and goggles. Don't think that those flimsy dust masks you've been using will be enough. Make sure to get a mask made for painting, unless you want to give yourself black lung and die. Huffing is not near as cool as those TV ads make it out to be.
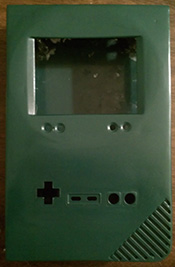
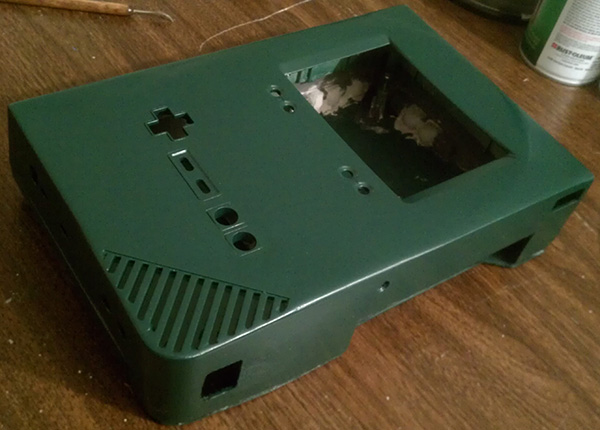 |
 |
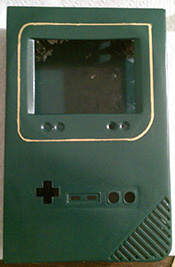
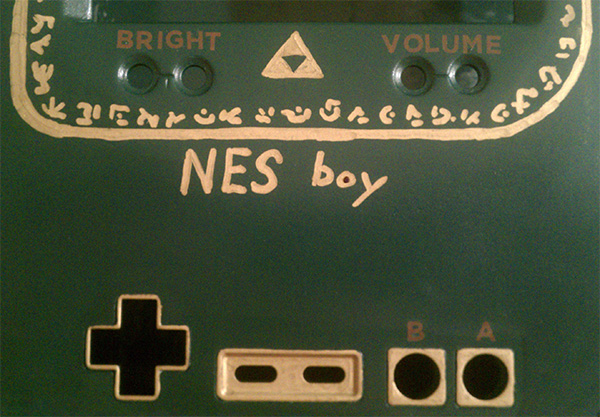
Once we have it painted, you might think, "Awesome, we're done!" Not so fast, sparky. We can add some final touches that will really make this thing shine. First off, we need a border around that screen, and since solid gold would perhaps look too gaudy, we're going to fill it with runes. To do so, we'll be using an oil-based gold Sharpie since it is quite opaque, and flows nice and smooth. (Unlike the cheap bastard metallic markers I got from Wal-Mart. They might've worked, but I swear they're like 50% alcohol, so they would have probably just eaten through the green paint and made a mess of things.)
 |
 |
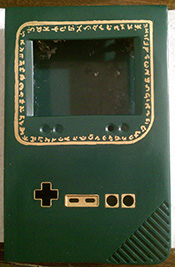 |
We can also add some dry-transfer decals (or wet-slide decals, if you're feeling adventurous) to mark off what the different buttons and ports do.
 |
 |
 |
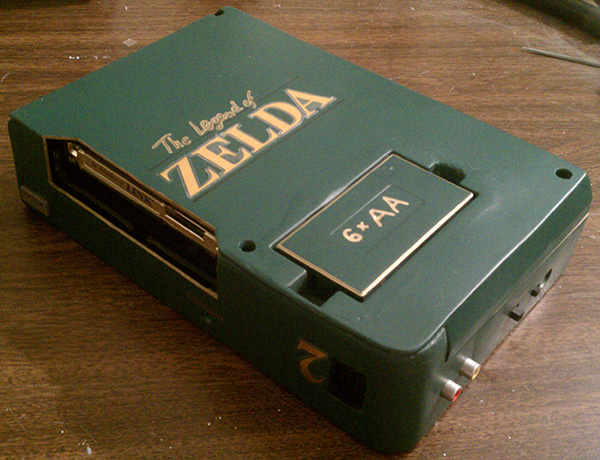
This led to a bit of serendipity. I bought some foil stickers with the intention of using them for "NES boy," but found that they were way too huge for the front of the system. So, I just hand painted that. As luck would have it, though, the font was perfect for adding a The Legend of Zelda logo to the back.
 |
And that, boys and girls, is how we make a NES boy!
 |
 |